Re: building power wrapper
Posted by:
Casey Abell
(96.28.123.---) Date: October 01, 2011 02:22AM
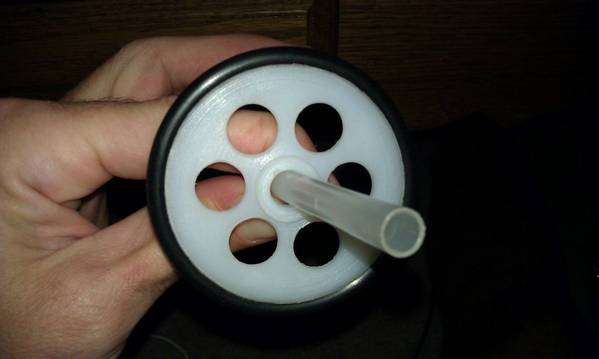
well I found the o-rings... here is one of the wheels which I must replicate for the wrapper
[ www.rodbuilding.org]
Re: building power wrapper
Posted by:
roger wilson
(---.hsd1.mn.comcast.net) Date: October 02, 2011 09:26AM
Casey,
There is little need to offset the rod support arms from the wrapper bed. But there are lots of reason to keep the rod centered over the rod bed.
The biggest need is to keep the weight of turning and wrapping over the center of weight distribution on the wrapper.
With respect to the base and finish coating - I just have various sizes of cardboard that are the same width as the wrapper base and are of lengths to just fit between the rod supports.
You can generally get O rings at Ace Hardware stores in the plumbing department of virtually any size that you need.
I was down at the local surplus store recently and picked up a bunch of 2 inch diamter rollers that had likely been intended for patio door rollers. These were of high quality brass, with a hig quality ball bearing in the center and a nice grooved outer surface.
I stopped by the local Ace hardware store to get O rings for the rollers.
However, I did not find O rings that were of large enough cross sectional area to have the O rings be above the surface of the grooved pulley.
I went to the big on line @#$%& site and picked up two dozen O rings of the right size and diameter for about $10. They work very well.
I much prefer the use of the off set overhanging rod rests for the power wrapper. I have a base for the rests that extend across the width of the wrapper base. Then a vertical member that is on the back edge of the base extending vertically. Then two horizontal members that extend forward to support the rod. On the lower member, I have two closely spaced rollers. The top member has a single roller that is centered above the two bottom rollers. I just use a nut and locking bolt arrangement for the roller members.
I make the lower member rock solid. Then, I make the upper member just a touch loose so that it may be rotated up and down for rod entrance and egress. The friction of the bolt and locking nut apply enough friction to just keep the roller in place.
The off set members allow for easy use of the wrapper and allow the hands to work directly under the rod, on both sides of the roller, if the rest happens to be positioned next to where a guide is located.
Generally, expecially when wrapping fine tipped rods, I will keep a pair of rollers near both sides of a guide so that there is minimal flexing in the blank when wrapping. Thus is is nice to be able to easily slide the rod rest bases easily up and down the base.
Be safe
Roger
p.s.
For the base, I used a 10 foot long piece of aluminum U shaBy the way, on average, the City draws more than 150,000 acre-feet per year from the Colorado River. That’s 134 million gallons per day (mgd). This is roughly equivalent to 8.5 feet from Lake Travis. Evaporation from Lake Travis also causes lake levels to decline even when no water is released from the lake. Evaporation accounts on average for about four and a half feet of loss per year.
ped channel. The channel is 10 feet long, 4 inches wide, and two inches high. It could have been shorter, but that is what I found at the scrap yard for $20.
I had a friend of mine with a large industrial mill, mill a 1/4 inch wide slot down the length of the channel, leaving webs in place every 4 feet or so, to keep the channel together. I started the groove about 2 feet from one end, where I will have the motor and rod handle mounted and stopped it about 6 inches from the end.
Since I like to stay in place and roll the work by me, I mounted 4 skate board ball bearings on the lower edges of the aluminum U edges. I had the bearings protrude about 1/8th of an inch above the edge of the channel. This allows me to move the wrapper at the touch of a finger to have my rod roll by my work station.
I have the luxury of having a long building room with a 15 foot long work bench, so that I can roll the wrapper back and forth about 6 feet, which is enough for most of my rods. I may have to move down a bit for the butt wraps and up a bit for the tip wraps, but generally less than a couple of feet either way.
Re: building power wrapper
Posted by:
David Dosser
(---.columbus.res.rr.com) Date: October 03, 2011 12:29PM
Remember, don't over do it for your first wrapper. The one you build now is already looking like a good one. It took me a little while to get used to power wrapping also. It's better to try and get really good at wrapping, paying attention to thread detail, alignment, tension etc, first.
David Dosser
Coshocton, OH
Re: building power wrapper
Posted by:
Casey Abell
(96.28.123.---) Date: October 03, 2011 09:33PM
David Dosser Wrote:
-------------------------------------------------------
> Remember, don't over do it for your first wrapper.
> The one you build now is already looking like a
> good one. It took me a little while to get used
> to power wrapping also. It's better to try and
> get really good at wrapping, paying attention to
> thread detail, alignment, tension etc, first.
I forget who said it but... " anything worth doing is worth over doing" LOL.. I think it was John Force.... HAHAHAHAHHA
Re: building power wrapper
Posted by:
Casey Abell
(96.28.123.---) Date: October 04, 2011 11:43PM
Okay I have another quick question
I was watching a video on You Tube of a guy using one of the fancy power wrappers. He was doing a butt wrap and it appeared that there was a knob he turned which moved the thread carriage left and right. Almost like there was some sort of rack and pinion setup for thread carriage travel.
The video wasnt all that great so I cant be for sure but it got me thinking. Did I see this correctly??? or was he just pushing it along with the knob.
It wouldnt be hard for me to come up with something to do exactly that... I dont think I would use a rack and pinion but a knob turning a wheel / tire which moved the thread carrriage along wouldnt be hard...
Re: building power wrapper
Posted by:
David Dosser
(---.columbus.res.rr.com) Date: October 04, 2011 11:50PM
Not sure on that one. I would have to see the video. I'm not aware of one like that.
David Dosser
Coshocton, OH
Re: building power wrapper
Posted by:
roger wilson
(---.hsd1.mn.comcast.net) Date: October 08, 2011 09:36AM
Casey,
I have a thread stand behind my wrapper that whos base if made of a nylon cutting board for easy sliding on the work bench. My work bench is a 12 foot piece of kitchen counter so it is nice and smooth.
I have an extra peg on the front of the thread stand that I grab when doing long butt wraps. Once I get a butt wrap started, I put the pedal to the metal and spin the rod at 1000 rpm which is about as fast as I can continue to do a good job with a wrap. It only takes a short time to do even a very long butt wrap at this speed. I just keep the thread moving so that I have a nice angle to the wrap to keep the wrap very tight against the adjacent wraps.
Sure, one could do a rack and pinion, but I think that much of the time it would just get in the way of easy wrapping. Remember, for all of the wraps except the butt wrap, there is next to no movement of the thread stand during a typical guide wrap, except for possibly the first and 2nd guides of larger spinning rods.
Good luck
Roger
Sorry, only registered users may post in this forum.
|


