Re: A rod called "Aurora"
Posted by:
Bob Foster
(207.189.245.---) Date: February 25, 2023 09:06AM
Hey Steve,
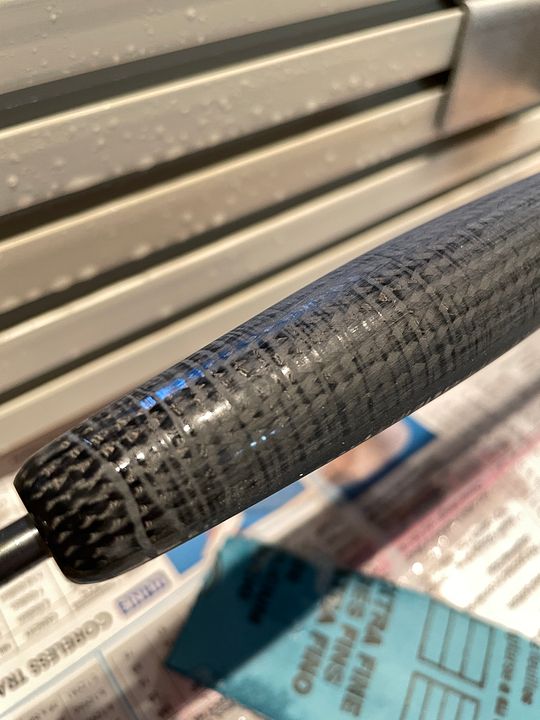
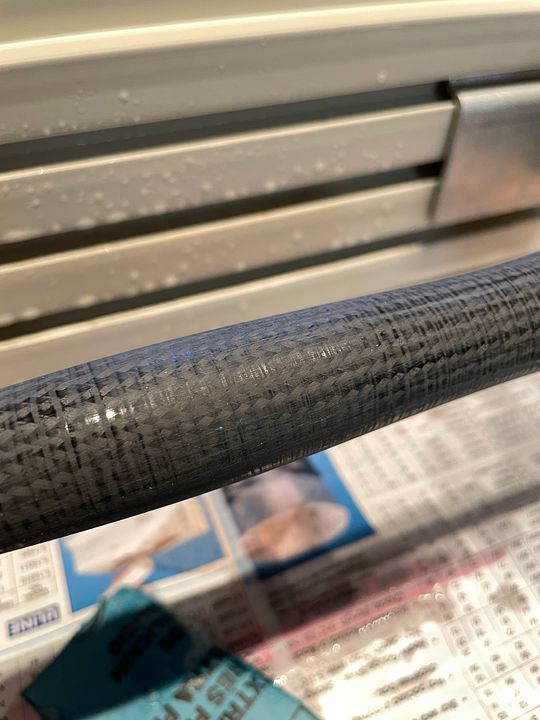
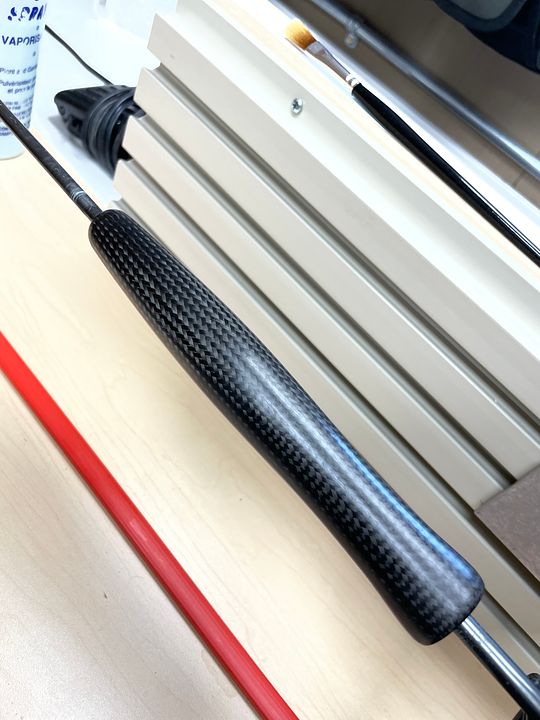
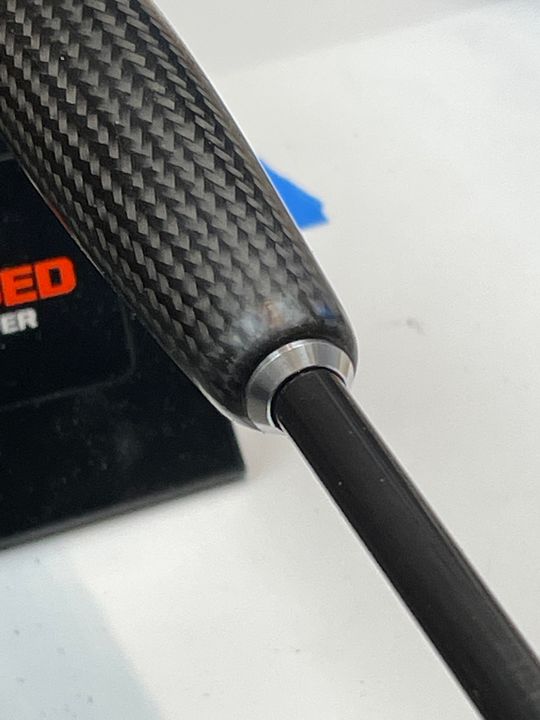
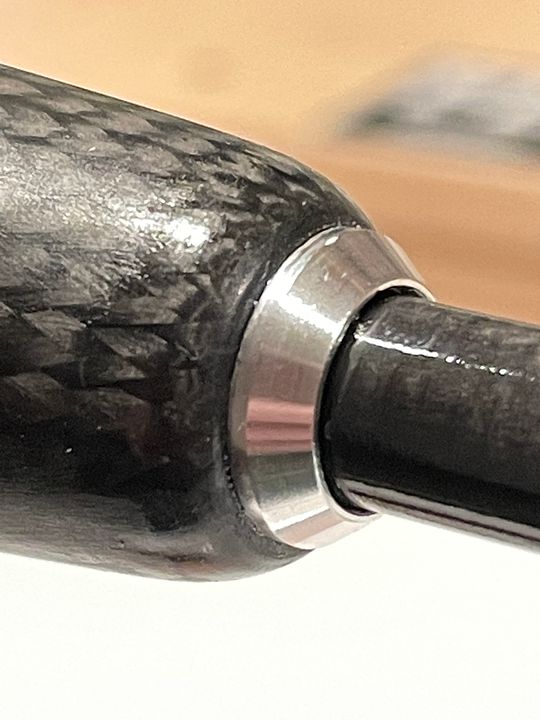
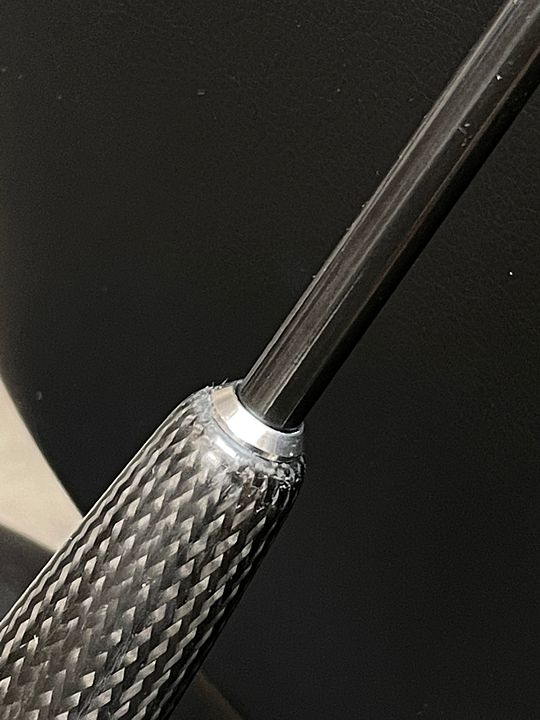
If I’m being honest i’m Not sure. When I had applied the epoxy initially I got my beard caught up in the epoxy and it got all over the Eva foam so I had intended to cover the Eva to the transition to the bottom. Tom then explained that I needed to sand it all down and basically do it right. This worked well as you can see and the line between the foam and the carbon came back in to sharp relief. When I applied the PG I just tired to sneak up on the line but if you look close you can see it got on the foam. Another issue...Yes! Haha
As to your question....I suspect I should have masked the foam off but the PG is so thin I feel it may still have wicked under the tape onto the foam. So basically I don’t know. When I make the attempt again I will use my magnifier and be more careful as I edge up to the line.
Part of me is crazily thinking of doing a huge fade wrap over the whole grip and hit it with the epoxy. But in truth I’m a little lost at the moment...
Edit: as to the pics...this thread is a bit of an experiment in truth. This is a format that I got used to on some other forums and though there are many pics if each one is actually worth a thousand words (debatable) then this format speaks to those trying to learn the craft. It invites more dialog and hopefully teaches myself and others a few things without trying to read straight text and interpret the info that way. Time will tell If it works out or is suitable for this forum. I am trying to be honest in it and not hide my mistakes. So far so good there haha. One thing I have noticed in rod building is that often there are good angles and bad angles to the pics when they are taken and often only the good angles gets shared...I’m trying to avoid that so will be sharing the screw ups as well and, if I ever get there, this will apply to the wraps also.
Edited 3 time(s). Last edit at 02/25/2023 09:23AM by Bob Foster.
Re: A rod called "Aurora"
Posted by:
Mark Brassett
(---) Date: February 25, 2023 10:06AM
Not seeing the problem with "sexy" Aurora. Perfection is a myth.
Re: A rod called "Aurora"
Posted by:
Bob Foster
(207.189.245.---) Date: February 25, 2023 11:13AM
Thanks for that Mark,
If you play the light over the grip the problem becomes pretty obvious. Kind of wish I’d left the sleeping dog lie as the first coat had one small dry spot the I could have semi hidden by placing it in line with the reel foot and one would never have seen it in normal use. The first coat was actually lovely and even as I say that, in my head, I hear “You should have seen the one that got away...”.
I agree that perfection is a myth. A thing I have always tried to share with my sons and crew who are unfortunate enough to call me their supervisor; “Always shoot for perfect. Then, after your best effort you will see you have fallen short of the mark but the result will reflect your effort. If you shoot for good enough you willingly embrace less than your best effort and your results will reflect that and still often fall short.”....or some such nonsense haha. I have numerous examples all around me of having fallen short of the mark, daily, but I try hahaha
Re: A rod called "Aurora"
Posted by:
Steven Paris
(---.242.14.198.dynamic.ip.windstream.net) Date: February 25, 2023 08:11PM
Pics are great so long as they pertain to rod building and yours definitely do.
thanks again Steve
Re: A rod called "Aurora"
Posted by:
Bob Foster
(207.189.245.---) Date: February 26, 2023 11:43AM
Re: A rod called "Aurora"
Posted by:
Bob Foster
(207.189.245.---) Date: February 26, 2023 01:04PM
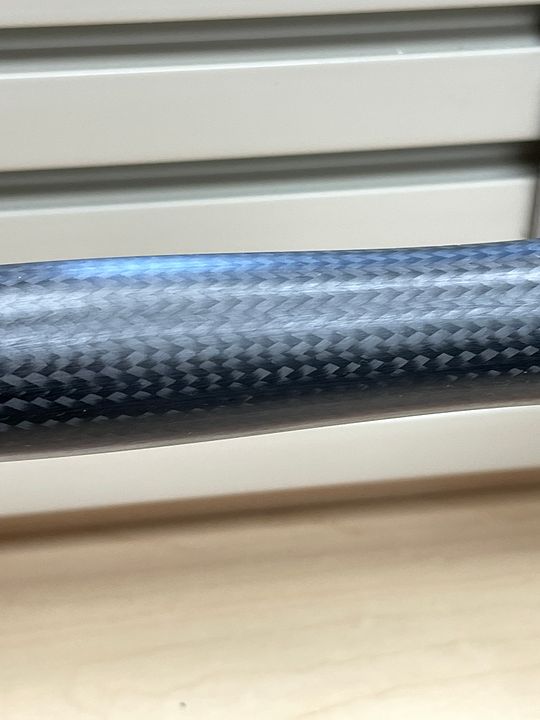
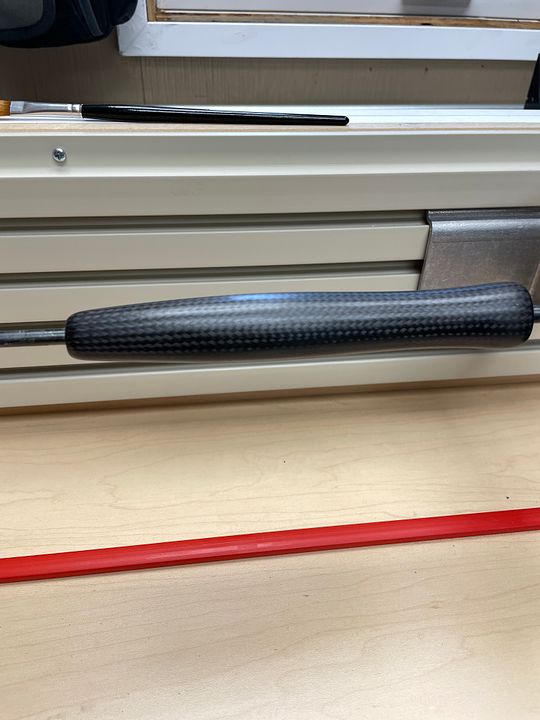
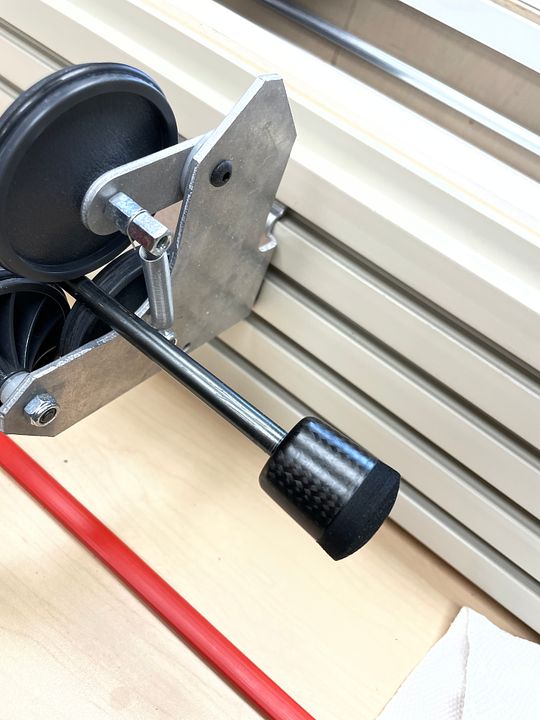
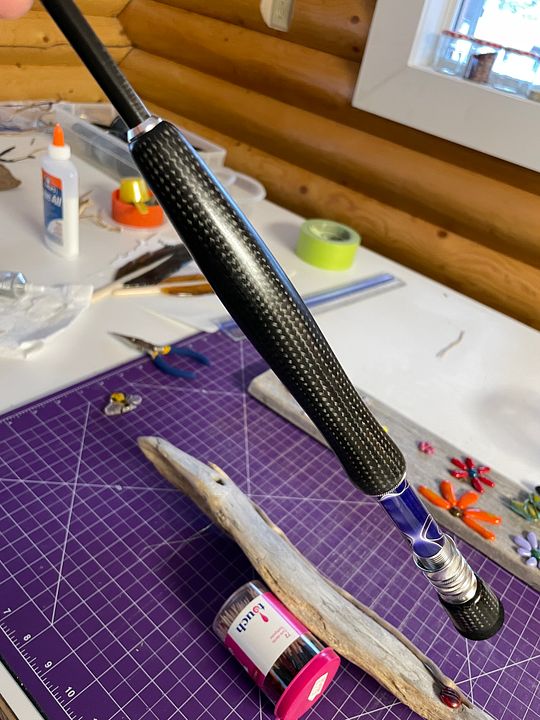
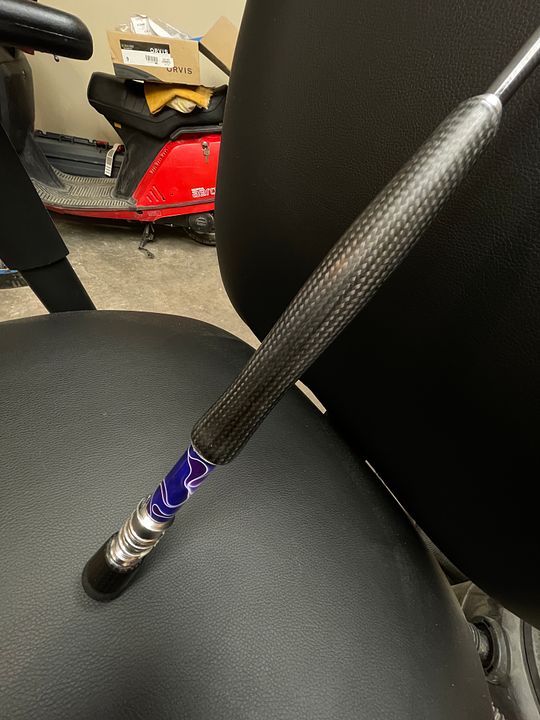
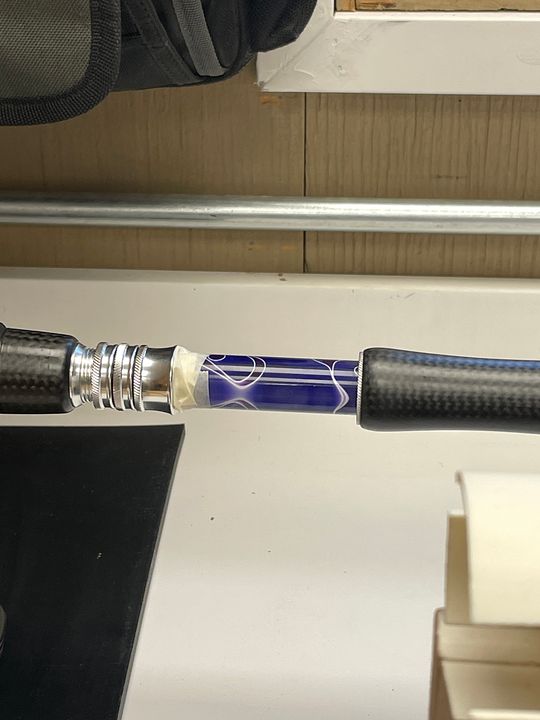
Having achieved what I didn't know was the plan all along in going full satin with the grips I found myself ready for gluing up the grips and reel seat.
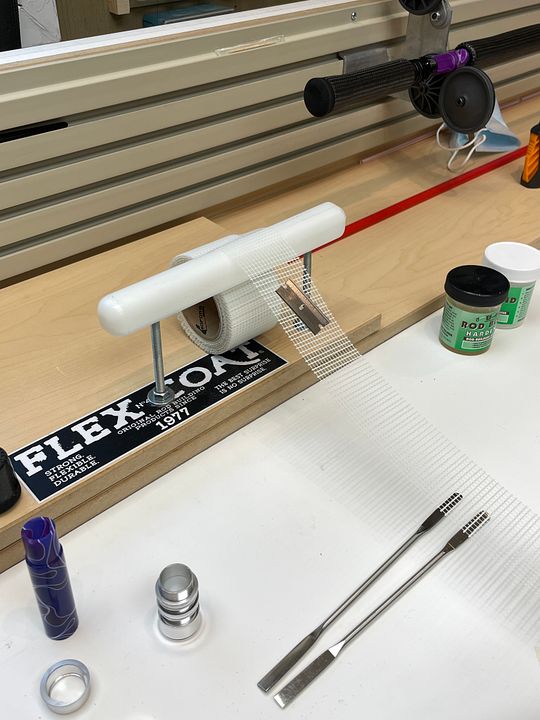
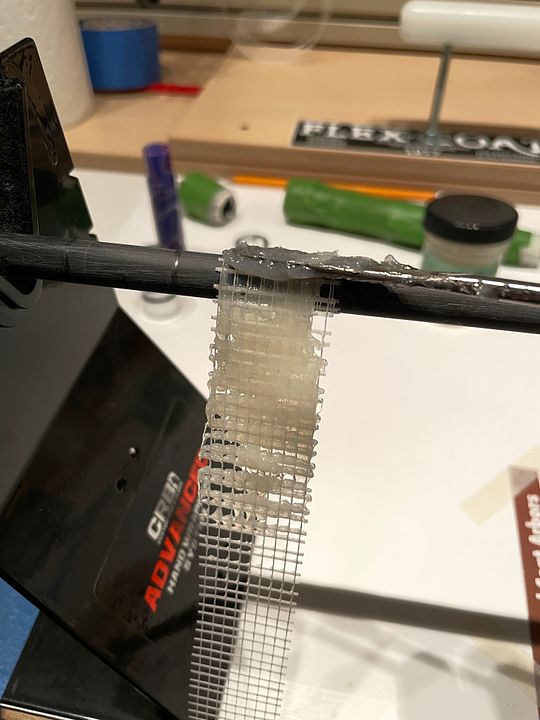
I like drywall tape for the arbors. I know many use masking tape but, for me, knowing the epoxy will saturate the drywall tape all the way to the blank gives me a feeling of security. I cut it into strips using a single sided razor.
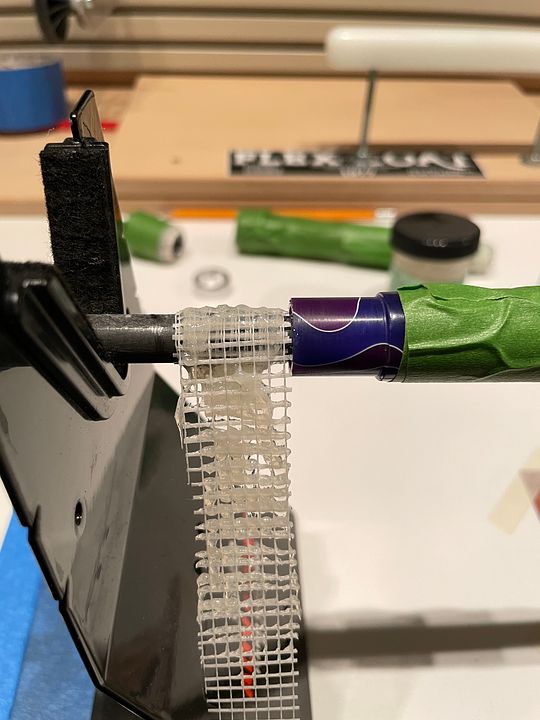
I precut and dry assemble all the arbors and components to be sure it all fits well and see if I need to address any fitment issues before the epoxy is brought into the picture, no pun. I use small bits of masking tape to tame the drywall tape and keep them in place for the dry fitup.
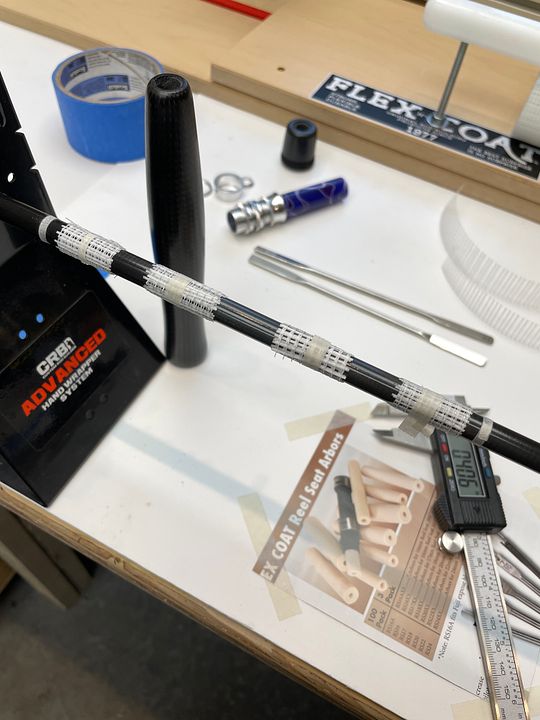
I use small bits of tape to mark out the various component locations. These will come off later. Another benefit of the dry fitup is that it gives you a dummy run of assembly and will define the order things have to go together and which arbors need to go on in what order.
Once the arbors are in place (not all are in place as some are bigger in diameter than others and the order of assembly dictates when the arbor can be placed) I dry fit all the components. If I am happy with the fit I prance around the room in different lights admiring the fit and how lovely it all is knowing that a messy and onerous task is just around the corner.

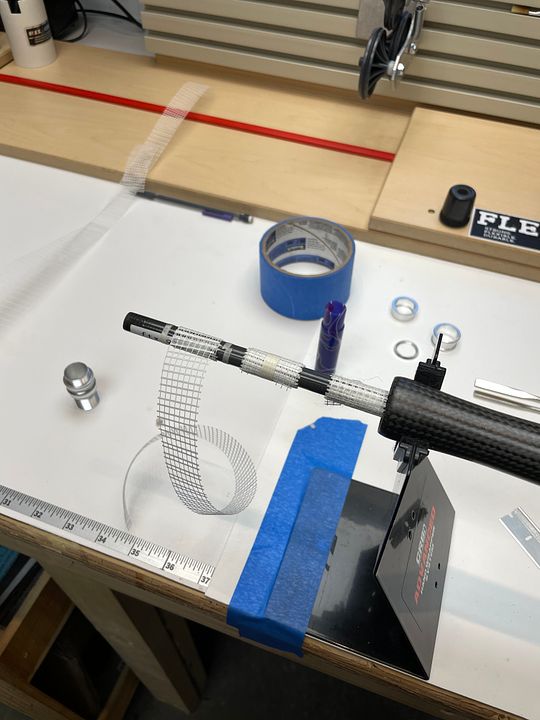
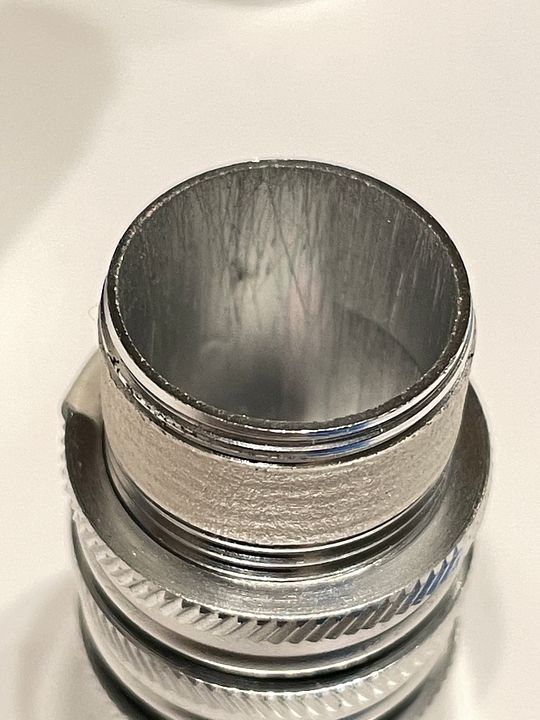
Once I am done frolicking around admiring my handiwork it's time to get down to the nasty bit. I strip off the arbors and lay them out to the side in the order they will lay in the assembly. It is kind of critical to not mix them up as the taper of the blanks and the different ID of the various components means that the arbor, if misplaced in the assembly, will cause fighting to try and get the component in place and may shove others out of place and mix epoxy into that scenario, well, you're going to hate life. Don't mix them up. I mask stuff off. I mask a lot of stuff off. I actually think it is a form of procrastination before the epoxy genie is out of the bottle. I scuff the blank where all the components sit then remark in pencil where the layout is. The marks are important for the same reason the arbors in the proper order are important...do everything you can to not fight pieces into place during the epoxy stage. If you misjudge where a piece will lay and only find out by trying to get an epoxy smeared component to sit properly but it won't because you have placed the arbor in the wrong spot you're going to be back to hating life. At this point it's a good time to scuff the inside of the real seat components and the winding check, this gives the epoxy something to bite into. I use a grip reamer and more or less rattle it around inside the components until it seems suitably scratched up. Once everything is masked and scuffed.....it's time.


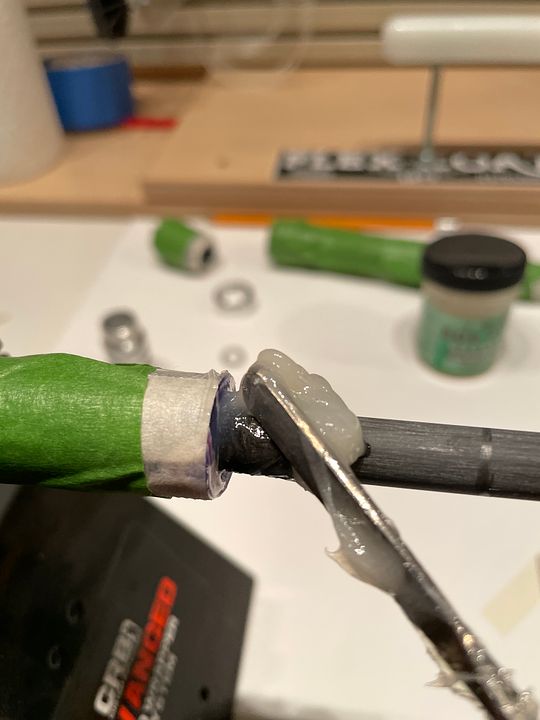
As I place the arbors and apply epoxy I install the component to the point of covering each arbor as it is installed. EG: When placing the grips as an example only apply enough epoxy to cover one arbor and part of the blank, slide the grip over it (rotate the grip in the same direction as the arbor is wrapped and don't force the grip on too heavily as the arbor will slide sideways. lots of rotation and gentle sideways force will get it done. Watch the arbor as it enters the grip. If it pushes sideways the arbor is too big or you are pushing too hard) but only far enough to cover the arbor / epoxy. Don't apply epoxy where the next arbor sits as it will be difficult to get the arbor wrapped. I generally make about two full wraps and then apply epoxy.


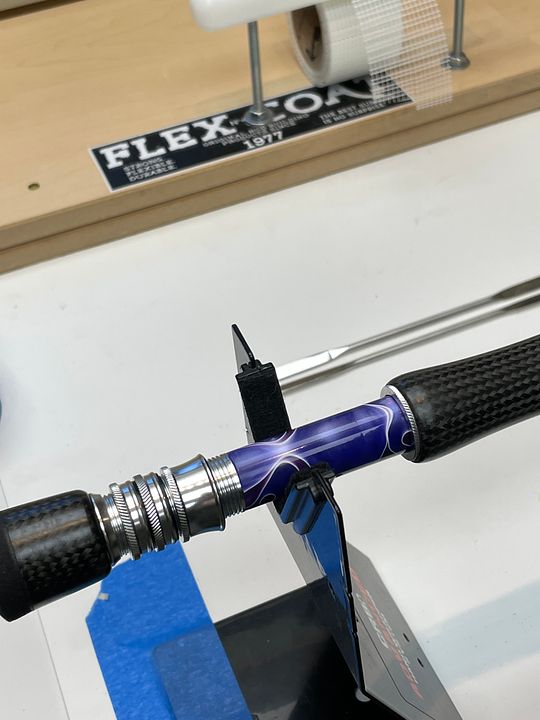
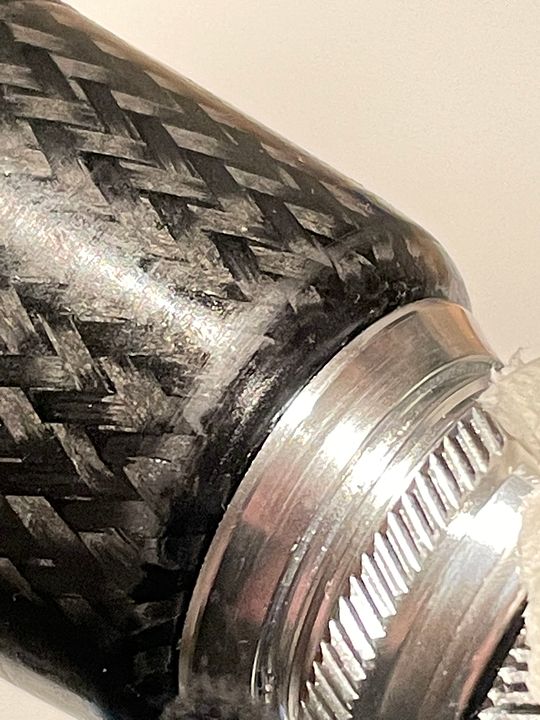
I tend to go slow and clean up excess epoxy before it squishes out everywhere. This is doubly true in the pocket where the top ring of the reel seat is recessed. If there is too much epoxy in there it will squish out onto the knurled edge of the ring and is a bear to clean up. Better to manually clean out the epoxy before you fully insert the ring. If you see epoxy squishing out, stop, pull it gently apart, clean out more epoxy and retry. Another reason to clean it out is you don't want the epoxy to end up under pressure and cause problems because the pressure will try to push the components apart. Clean as you go and wipe with alcohol to keep things clean and in the end you should not have any glue "shiners". When two pieces are glued together and epoxy gets between them it is difficult to get it clean enough to where you won't see the epoxy "shine" in between the components upon close inspection. Once you see the shiners you cannot un-see them so patience and cleanliness are your friends here.

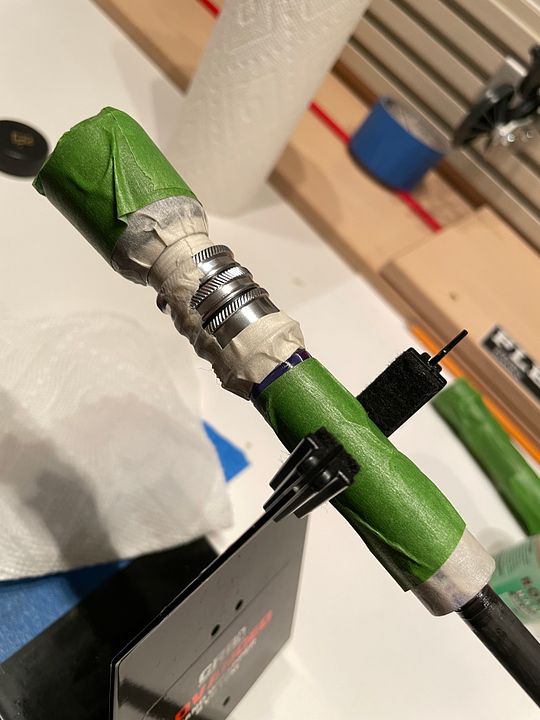
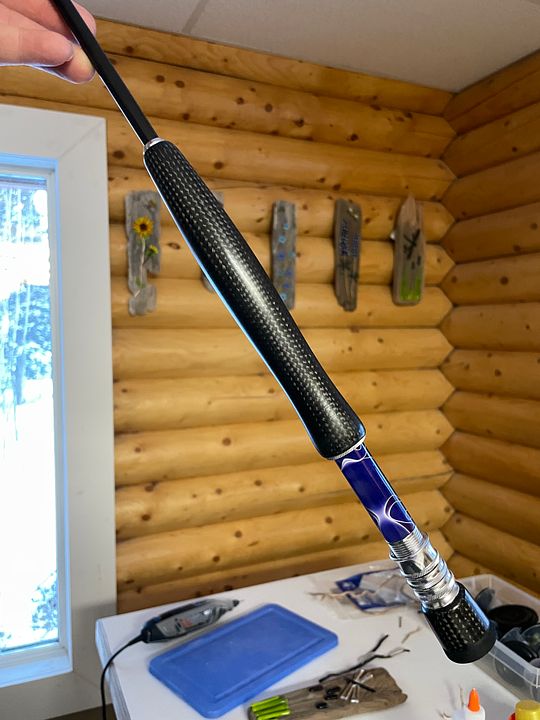
Once it's all glued up, as gently as you can, remove all the masking and clean any epoxy up as you go. I perhaps apply too much tape but I hate noticing spots here and there where epoxy has gotten on my hands and then transferred onto the assembly \ blank, requiring me to stop and clean it off before it gets worse. Once the tape is all gone and the whole assembly is clean you can go ahead and place the winding check. Like the proverbial cherry on top.
With patience and luck you should have few if any shiners it all should look much the same as it did during dry fitting. Feel free to going back to prancing about looking at the thing in different lights and angles. I know many tape up the assembly at this point and I have done so as well but have also found you commit to whatever is under the tape, so if any epoxy squishes out or a piece moves slightly you are stuck with it. I tend to not tape it and just keep it near me for 2 or 3 hours and I will keep gently pushing it together and deal with any missed epoxy as it sets as well as make sure the winding check and everything else remains centered (careful fitment of the arbors aids greatly in making sure components stay centered to one another). Often I will use this time to sharpen a knife or two....a hobby of mine.

So....it's all glued up and once set I'm on to laying out my guides and starting my wraps....actually it's the next morning as I type this and the set piece is sitting next to me. After a bite I will head to the studio and start fussing with the base wrap. This stage always feels pivotal to me and gives me motivation to get to wrapping...
Cheers,
Re: A rod called "Aurora"
Posted by:
Norman Miller
(Moderator) Date: February 26, 2023 07:17PM
A little trick for you. Tack the leading edge of your dry way tape arbors to the blank using superglue. Doing this will prevent them from slipping or sliding when applying the epoxy and when moving the components into place. Apply the epoxy to all the arbors at the same time and then carefully slide the reel seat components into place. Then apply epoxy to the blank and slide the grip into place. Any excess epoxy can easily be removed using a dry clean paper towel. If needed a touch of alcohol can be used for final clean up. This process should take less than a few minutes to complete. This might save you a few grey hairs and an ulcer. Don’t over think this, it’s much easier than you think.
You used a couple of bottles of Permagloss? A small bottle will do more than a dozen grips. If you don’t have a foam brush a soft bristle brush will work fine. The bristle brush can be cleaned with alcohol or acetone. A couple of coats is all you really need for a good looking and durable finish.
Norm
Re: A rod called "Aurora"
Posted by:
Bob Foster
(205.234.62.---) Date: February 27, 2023 08:56AM
Thanks for the tips Norm.
Mostly the arbors themselves don't slide but more the top layers of the tape, once saturated with epoxy, smoosh sideways if you push too hard when assembling. I may try the super glue trick. Finding super glue is handy to have around the bench. I find if I cover all the arbors at once (the ones I can place without hampering assembly) the ends of the saturated arbors start to come loose and I just find it easier to do them one at a time. It's basically the same thing as covering the whole area, but the epoxy goes on as each arbor gets covered by the component. I am happy with this part of the process to be honest. I found when I'd just mash the components together and wipe everything up it was just too messy and I'd have to spend too much time on the joints of the components cleaning the epoxy away. Doing them one at a time, I can keep it clean and especially keep the joint areas clean just before they meet. Again, more or less the same thing just staged and timed a little differently if that makes sense.
Yes, I guess I sorta knew I was using too much PG. I was basing it on watching how much was soaked into the grey brush in Tom's video and tried to approximate that much into the cup. I will for sure try this process again. To be clear I did not have 4 coats on at once. I would do a coat and not be happy with the result than sand it down to satin and try again. The grey brush that I did have at first worked well but there was a dry spot and it kind of spiraled out of control after that in trying two different kinds of foam to recoat and not being happy with the results. I was thinking about trying once more with a brush but in truth I like the satin and the more I see it the more I like it. but I will try again. I think with the foam brush I also worry that there is enough PG saturated in the brush to properly cover the area without the foam wicking dry part way thru.
Paying my dues on the PG front I guess. One thing about having trouble with any given thing is that you get good at that thing by being forced to deal with the characteristics of it. Already I'm pretty good at sanding the grips down to satin haha
Thanks again
Re: A rod called "Aurora"
Posted by:
Les Cline
(---) Date: February 27, 2023 11:03AM
When I ran my own business, I used to say, "I have a 100% satisfaction guarantee....for those who can ACTUALLY be satisfied." I get the perfection-thing! Ha!
I definitely hear you about managing epoxy....it can get very messy very quickly. Shine-spots make me nuts, too.
Surface prep is very important, IMO, and I am glad you mentioned it! This is an aspect of rod-building that often gets overlooked amid all the other technical stuff. Ralph O'Quinn, the inventor of Rod Bond, has a science-based and informative white paper for making a "Water Break Free Surface" in the prep of mating parts. That article is floating around the forum some where. I made a type of Scotch Brite barrel cleaning tool with a piece of aluminum rod. Think shotgun barrel cleaning rod. This makes for a handy rough-up tool inside reel seats.
Side note: Ralph did research into carbon fiber laminates in air plane wings for the military; their pet dog at their remote lab site was named Trondak, now the company name. I met and had dinner with him at an ICRBE years ago, and he had one of those brilliant minds and gentle personalities.
Along Norm's line of thinking about taming the drywall tape, to keep the final edge from curling up or the top layers sliding sideways I do this:
I use my fly-tying thread bobbin to do a spiral or two up and down over the drywall tape in the direction the tape was applied. Not much tension on the thread or it will compress the tape. Then, use a pull loop to secure the thread tag.
You seem to have found a process that works for you, and I commend you for that!
I actually prefer a matte finish to a glossy one, too!
Prance on, my friend!
Re: A rod called "Aurora"
Posted by:
Bob Foster
(205.234.62.---) Date: February 27, 2023 02:08PM
Hi Les,
The 100 percent guarantee thing would make a good t shirt.
Perfectionism is kind of a where you stand depends on where you sit thing. I used to work for the telco up here as an installer and we always did as good a job as we could and usually we were not hurried so we could spend the time to really make an installation look nice. Fast forward to contracting doing the same work and it quickly became obvious that not everyone was willing to pay for near perfect so it became a matter of a polished "good enough" if I didn't want to fight over hours and billing all the time.
I am going to do that scotchbrite thing. Makes more sense than what I have been doing to be honest. Also I think I saw the water break free post and will try to track it down again.
The other day while I was gluing this reel seat and grips up I forgot to put the top ring on the seat but only after the front grip was three arbors on. I had to remove it to put the ring on and the three arbors were right where I put them so that was nice to see and confirmed to me the method works. I find epoxy mess very triggering l haha. Different strokes at times I suppose.
The more I see the matte finish the more I like it. I had a little panic moment when I took the maskng tape off the grips and it left blemishes / residue on the grip. The permagloss was only a few hours old and likely it was too soon to be so aggressive with it but a bit of work with the grey scotchbrite and all was good again.
Cheers,
Re: A rod called "Aurora"
Posted by:
Bob Foster
(205.234.62.---) Date: February 28, 2023 09:41AM
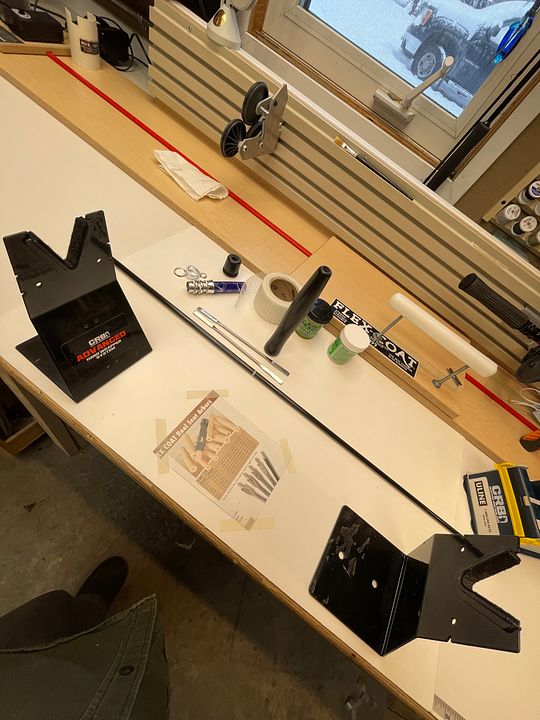
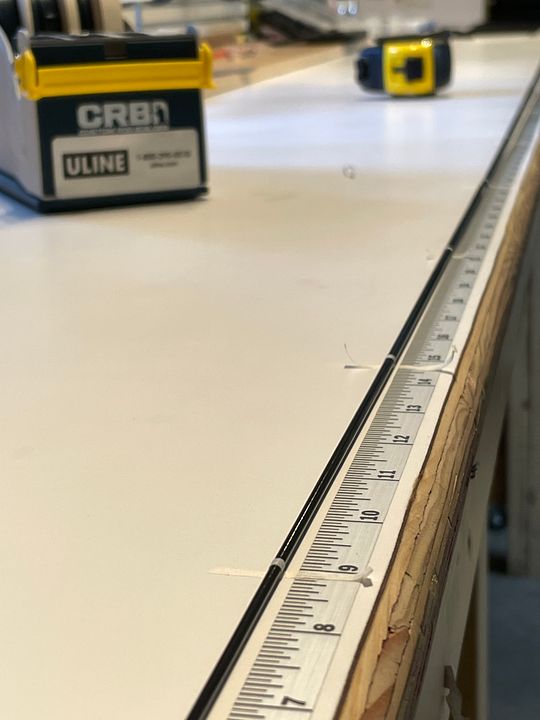
Laying out the guides and looking at placement. If I'm being honest I have no real clue what I'm looking at. Having done this a few times and using various sources for guide placement I wonder what the deal is with testing and adjusting the guide layout. I mean it seems I never see any real glaring problems with layouts. Am I missing something? For instance, on this rod the layout info I have have two of the guides being too close to the ferrules and both of them wanted to migrate towards the reel seat. I just kind of bumped them where they needed to go and nudged the nearby guides a tad to compensate for the two guides having been moved, maybe 1/2 inch or so.
Layin it out....
Flexing. It seems to flow ok and my plan is to run with this layout. Am I blind, or perhaps willfully so?
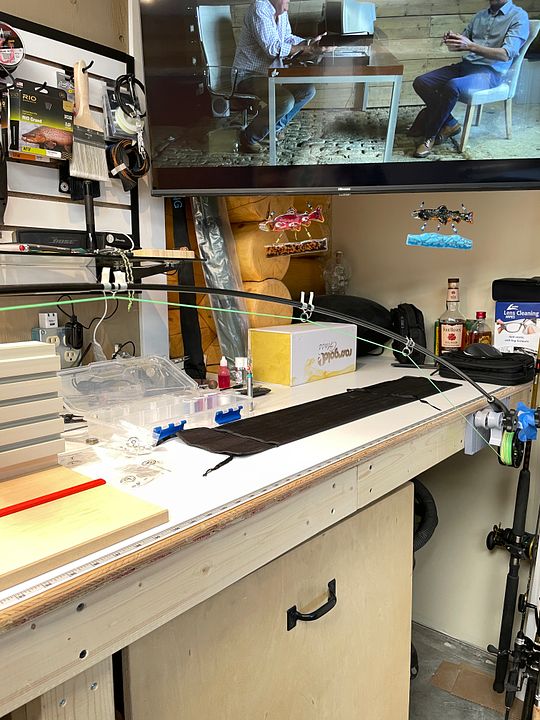
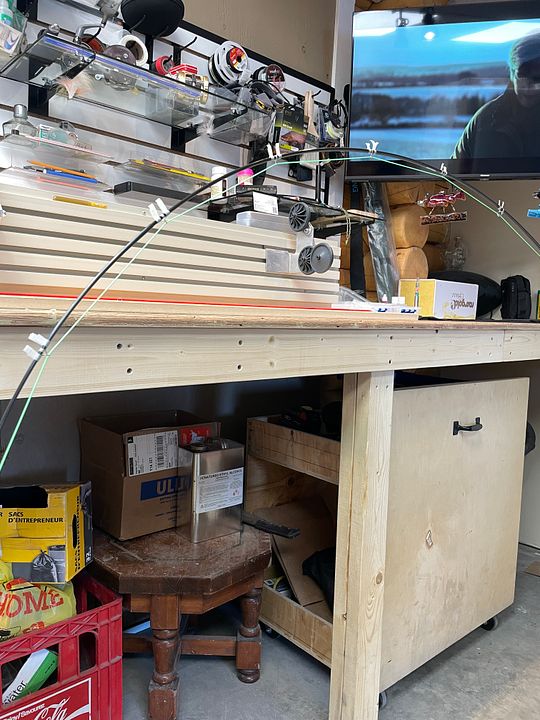
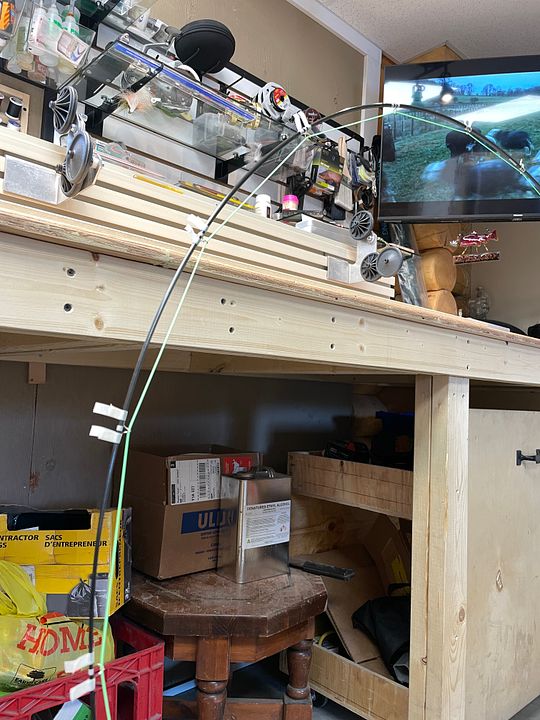
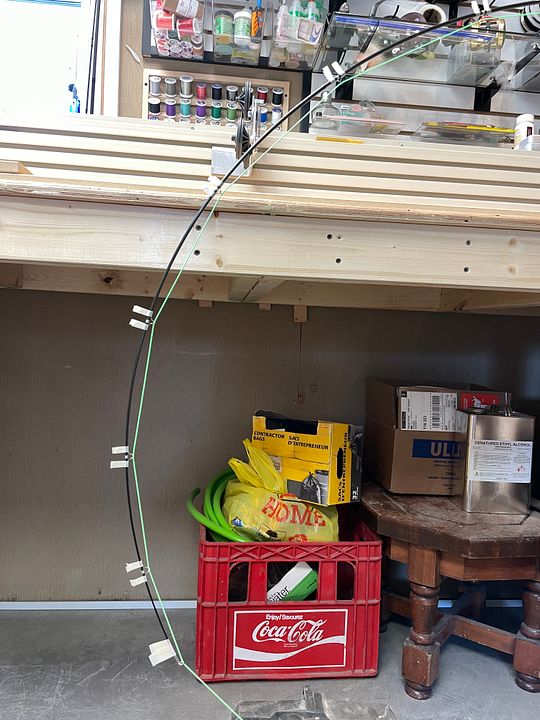
I have a little time as I'm working a bit on the base wrap but am curious what I should or should not see in this test. I've read some about different methods of testing and this seems the simplest most real world method, but does one ever run into a situation where the layout is obviously out to lunch?
Edited 2 time(s). Last edit at 02/28/2023 09:46AM by Bob Foster.
Re: A rod called "Aurora"
Posted by:
Les Cline
(---) Date: February 28, 2023 12:24PM
Let the rod tell you how many and where the guides need to go! Think of layout charts as suggestions and starting points.
Conventional wisdom is to use one or two guides more than rod length + tip top. So, a nine-footer would use 10 or 11 guides + tip top.
Personally, I like to use another guide or two more than that (minimum 11 to 13 on a 9-foot rod) because my testing says to do so. See below.
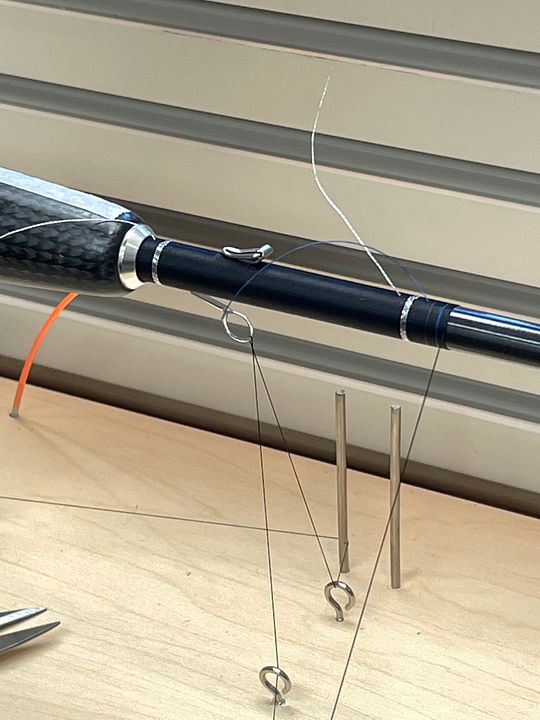
Are you familiar with the Two-Line Static Test? This method flexes the rod naturally with minimal tension/distortion of the guides themselves. The rod bends how it wants to without the guides playing a factor. The goal is for the guides to make the line follow the natural bending profile of the blank.
Here's what I do for a Two-Line Static Test:
* Set the butt end of the rod like you have it in your photo. I usually set it level, but I'm not sure that really matters.
* Run the fishing/reel line through the guides (Line 1) and attach a weight to it that is just enough to maintain tension on the line. I use a 1/2 oz. sinker, but you may want a lighter or heavier one. My sinker hangs about two
inches outside the tip top.
* Attach a separate line (Line 2) to the tip top guide itself. I use about 10 feet of #10-12 mono for Line 2. This is the line that will be used to pull the rod into its natural bend profile; and it won't put any stress on the guides or
running line.
There are a bunch of ways to set up the test from here; this is what I do:
* I run Line 2 through the hole of a mushroom-shaped boat anchor placed directly below the rod tip on the floor.
* I tie-off the free end of Line 2 to another movable weight (I use a #25 bag of lead shot). I can now pull the weight and Line 2 to any length I want away from the anchor point, and it will pull the rod tip straight down. Pull a little,
the tip deflects a little. Pull more = more. I can get whatever bend I want by moving the bag of shot in or out.
I look at how the running/reel line follows the natural bend of the blank when I pull the tip down. The closer the line is to the blank, the more it follows the natural bend. Spaces between the blank and line that appear too large indicate to me that I need to put the guides closer together in that area. I move the guides to get the 'flow' and spacing that looks good to me. (That's why I often end up using more guides than less...especially in that front 1/3rd where the most bending is happening.)
Just my opinion since you asked: If it were me, I would look at adding another guide (or even two) to shorten the distance between your tip area guides. For specifics, the distance and angle of the line from the 2 thru 5 guides from the tip look too large to me. At least one more guide in this area, IMO. Between guides 5 and 6 and 6 and 7 look better. See how much smaller the distance is between blank and line in guides 6 and 7?
Side Note: At an ICRBE event (I think 2011) a fly guy brought a rod with something like Double the amount of guides on it. Yes: 18 guides + tip top on a 9-footer. I had to cast it! So, I did! I wish you could have cast it too because it blew my mind how smooth that rod cast....and the sense I had that the way the rod was bending was the way it wanted to bend so it felt alive. He wouldn't sell me that rod.
You are doing a great job and I am enjoying your thread! I value the learning opportunity to see your process!
Re: A rod called "Aurora"
Posted by:
Bob Foster
(207.189.245.---) Date: February 28, 2023 08:54PM
You’re very kind Les,
Sometimes I think about what things were like pre internet. I watched it come in and my first experience with it was dialing into a Maine number, from the Yukon, to reach a dial up modem and you had to speak Unix to move around the directories and chat channels and such. The info was there but it wasn’t much and was hard to find. Previous to that it was all libraries and yellowpages and magazines / publications and personal contacts. We are very lucky now to be able to access detailed information on virtually any given topic.
If I had a formula of increasing spacing for a given amount of guides I’d just do the math and lay it out again with another guide in the mix. I may be willfully confused in denial of being lazy in moving the guides around. The tape makes it time consuming and I think I will have to explore the two line method. I have gobs of tiny tie wraps that I could use as mock up guides and just use a piece of tape to trap them against the blank after slipping them over and along the length. I have a bit of time, while I mess with the butt wrap, to read more on it. I’m having second thoughts about my color schemes. There are many aspects I find challenging about rod building, colors are one.
I do see what you mean on the line profile. Just hard to know what is allowable. I do have an extra guide and think I’ll just figure out how to add it in.
Randomly, and barely on topic, I found myself googling whether anyone had created a rod that, when flexed, bent into a golden spiral haha. I was not able to find any examples. It would be great marketing assuming enough fisherman were familiar with the Fibonacci sequence.
Edited 1 time(s). Last edit at 02/28/2023 09:01PM by Bob Foster.
Re: A rod called "Aurora"
Posted by:
Bob Foster
(205.234.62.---) Date: March 01, 2023 12:20PM
Awesome Kevin!
Thanks for those...
Re: A rod called "Aurora"
Posted by:
Les Cline
(---) Date: March 02, 2023 01:36PM
The Fibonacci Sequence (FS)...Sweet!
Utterly amazing subject/phenomenon about the Natural Shape of things...and the Math that describes it! Math is always catching up to Nature, not the other way around....and this is an important distinction to me. I often chuckle at my own hard-fought and tenacious grasp of my personal opinion. No offense to anyone else...it's MY opinion... so it has to be true!! In my defense, The Laws of Physics actually DO sometimes change when my "Perfect Cast" under that tree limb gets hung up in the branches. There is no other possible explanation, right? Ha!
Why doesn't this (FS) relate to the rod-building craft!? The way I see it, we live in a physical world governed by Laws we are still trying to understand...and are constantly revising based on new information - at least I hope so.
New materials and technologies.
New Guide Concepts.
New Lines and Reels
On and on...
I'm not sure how the FS relates to fishing rods exactly (non-organic things versus natural-living things), but I completely like the curiosity and out of the box thinking about how they might. Curiosity more than Dogma moves things forward, IMO.
Re: A rod called "Aurora"
Posted by:
Bob Foster
(205.234.62.---) Date: March 02, 2023 02:05PM
It is fascinating really and hard to debunk it seems?
I did run across some folks talking about tying up "Fibonacci Leaders" for fly fishing. There is even a calculator for them. I tried doing the math to layout the guides on this rod and it looked good for the first five guides and quickly gets out of hand....for the first few guides tho I was like "well @#$%&...". I started at 4 inches from the tip and multiplied by 1.618 and repeated the math for the result but this is not going to be the miracle formula for guide layouts haha. It looked feasible until about 27.5 inches then quickly fell apart
[ www.moucheur.com]
Re: A rod called "Aurora"
Posted by:
Les Cline
(---) Date: March 02, 2023 03:39PM
Bob,
I applaud your testing and trying something different!
A curious question...could the FS work on that front 27.5 inches....and then maybe another set of physics takes over as the taper thickens? More whimsical than practical on my part. At any rate, for many reasons, that front 30-inches of the blank is a different animal than the rest because of taper, stress/flex....you know. Graphite and fiberglass are different than fern leaves unfolding in the sun.
That's what I mean about the challenge of applying one set of Rules to another set of Rules. What Rules apply to the formation of solar systems, sunflower seeds, and the behavior of colliding atoms are all related, AND different at the same time. Applies to guide layouts and galaxies in my philosophy. Keeps me curious and amazed.
Two-Line Static Testing seems to me the way to go Natural with any particular blank. Let the blank decide. You don't have to guess what it wants.
I also trust experience gained over time. I think experience is the hard-won anecdotal proof of science/physics over time. Science and experience are not always opposed. What has worked for a long time will probably continue to work for a long time as long as all the variables stay the same, IMO. When variables change, outcomes often change, too.
Anyway, these are just my thoughts. Keep up the fine thread work and putting yourself out there!
Re: A rod called "Aurora"
Posted by:
Bob Foster
(207.189.245.---) Date: March 05, 2023 12:14PM
Thankfully my ADD made sure I didn't spend days trying to use the fibonocci sequence to lay out my guides but I am for sure going to try the FS to 27.5 inches just to see what it looks like for the next static test. I kinda do wonder what such thinking might result in were a person to build a FS into a rod blank. For now I'm going to concentrate on laying one thread next to another...
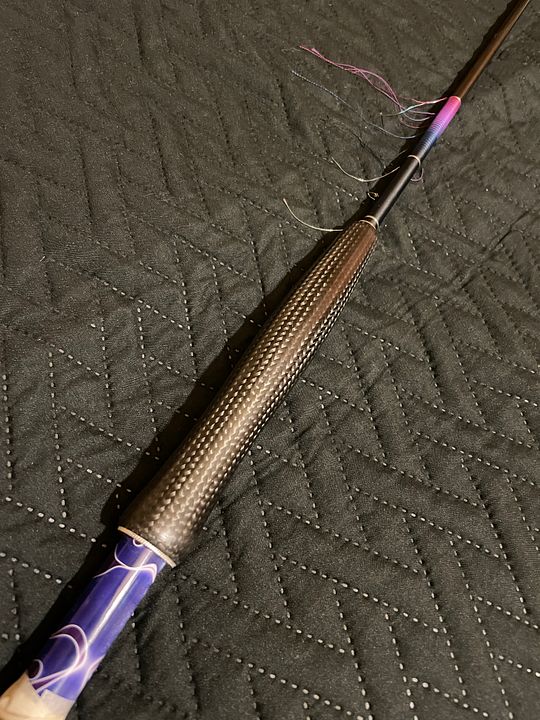
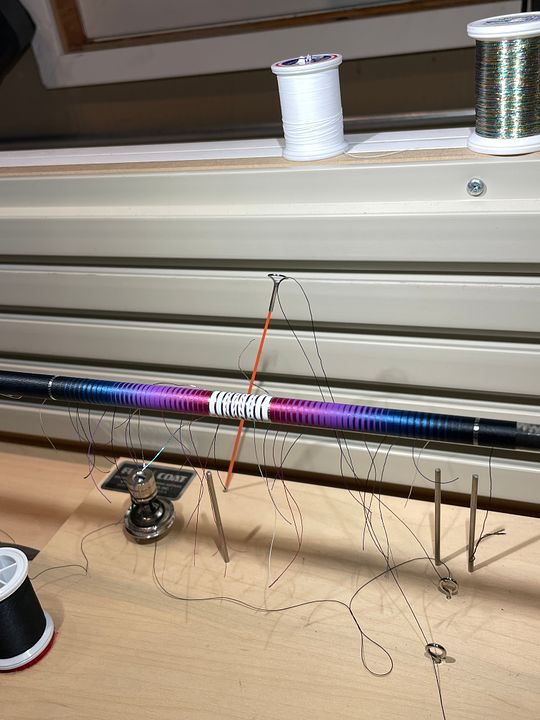
I got the base wrap done.
I'm about to apply the first coat of finish. This is kind of a pivotal coat. The colors I picked and laid out made sense and seemed to match the reel seat but once I had it done the result just basically looks pink. I was shooting for the violet to pop out in two places and the rest would be quite dark in the off light and the maroon plus the blue would pop out in the sun. The violet is a color locked thread and the rest are all non color locked. My last hope is that my initial plan will still come thru. That is, the blue and the maroon will darken to nearly black or at lest very dark and the maroon will not contrast in a way that makes the violet look pink. This rod is for a 55 yer old man and the theme is loosely based on the aurora but I fear it is a little more feminine than I was imagining it might be. Colors re hard. Funny I say that about each part of the process haha. Colors are hard, epoxy is hard, guide layouts are hard, ccs is hard, sourcing components are hard, wrapping is hard, glue ups are hard....but it is all strangely satisfying so here i am
This is where I started to question my color choices...
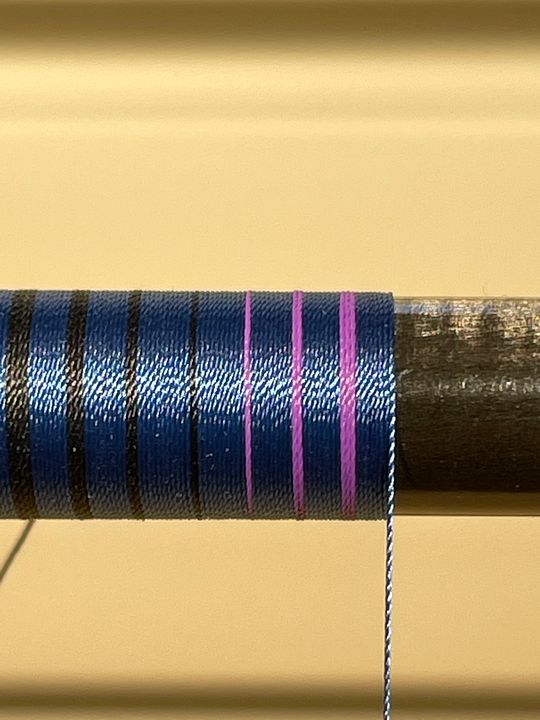
By this point there is no denying...it's pink...

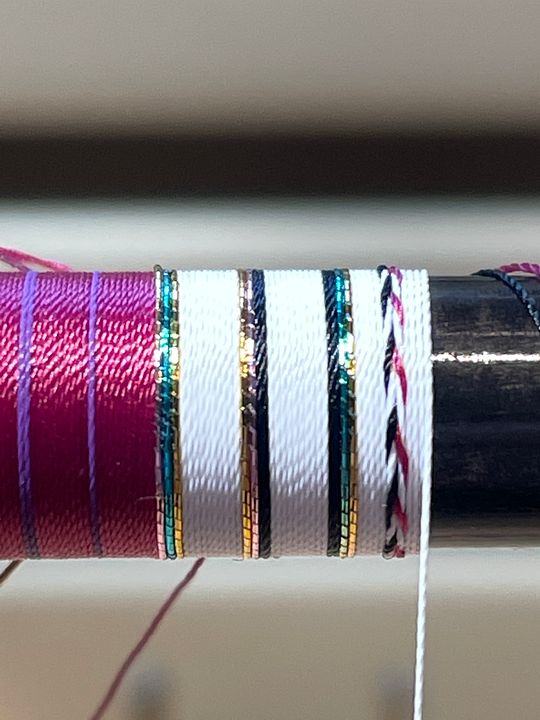
Decided to press forward into the center feature. I think this will be the last rod for a bit where I use this fade with center feature layout. Or perhaps play with saw blades and such....
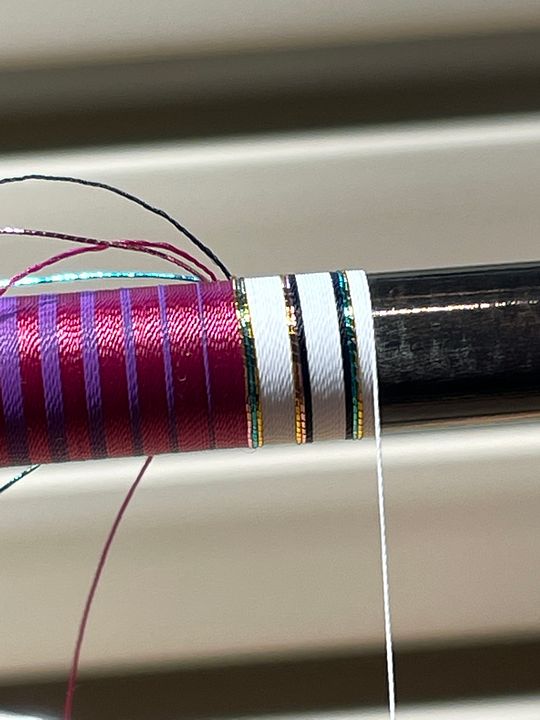

All along Ive been hoping it will look less pink at some point but the base wrap is done and it still looks pink
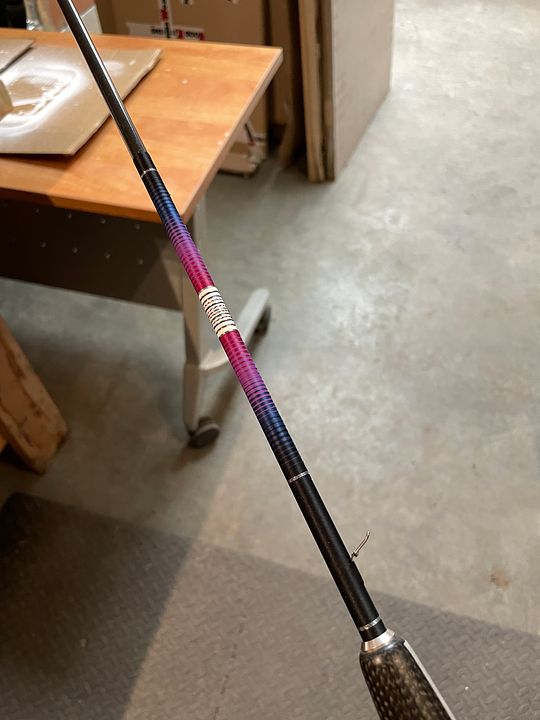
So....I'm going to finish it. I almost cut it all loose but I do like the effect. There is just the question of whether this is just leaning too far towards the feminine. I know for sure it is going to look much different with the finish applied. I really like the nature of non color locked thread and how it seems that sunshine can change the whole look of a rod. It's like getting more than one scheme wrapped up in one effort. That is my hope....a very dark looking effort with two pops of violet fade plus the center feature. Once in the sun the blue and maroon will makes themselves known and give a rich lustre to the whole mess.
Away I go. Clean up from wrapping and prepare the first layer of finish on the base wrap...
Re: A rod called "Aurora"
Posted by:
Bob Foster
(207.189.245.---) Date: March 05, 2023 02:17PM
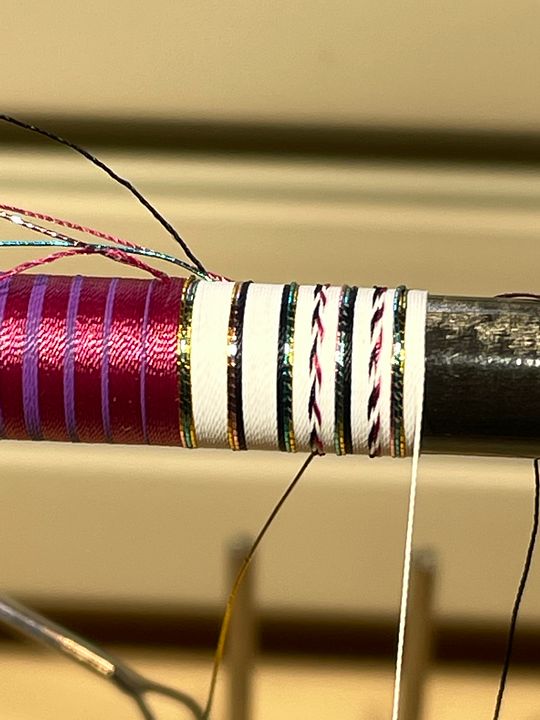
Feelin better about it all...
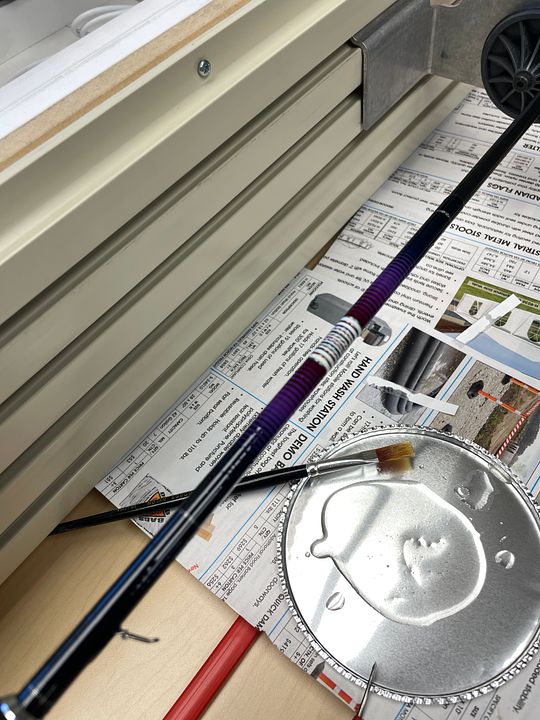

I haven't seen it in the sun yet but so far so good I think...
Lots of bubbles and stubble. Epoxy is just the worst haha. Gonna be an hour with a razor to put it right for the second coat. I tried this with a brush and the whole time I wanted my spatula.
Sorry, only registered users may post in this forum.
|